Create Visual Studio Project
How to Create a Visual Studio Project using DocDigitizer WorldObjects
Setup Visual Studio Project
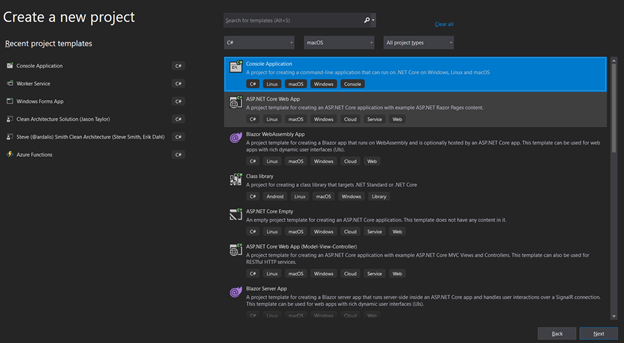
Open your Visual Studio.
Create a "Console Application" project.
*Note: for this demonstration, a "Console Application" project is sufficient, but you can use a NuGet package to provide DocDigitizer WorldObjects in other types of projects, considering the requirements of each case.

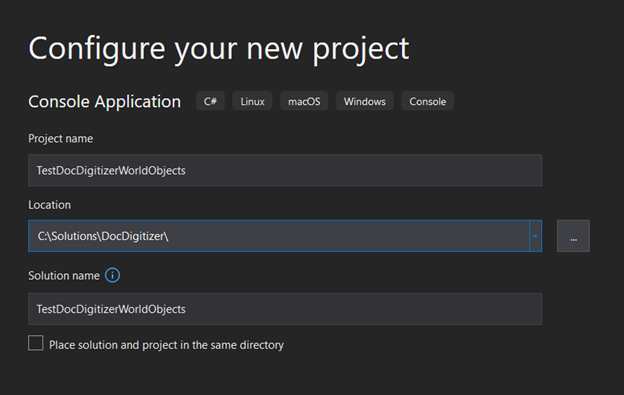
Give the following name to the project: "TestDocDigitizerWorldObjects."

Install NuGets
Install the two NuGet packages on your Visual Studio project that you created.
- DocDigitizer.SemanticObjects.MyObjects.MyBuild.1.0.0.nupkg
- DocDigitizer.ServiceAPI.1.0.4.nupkg
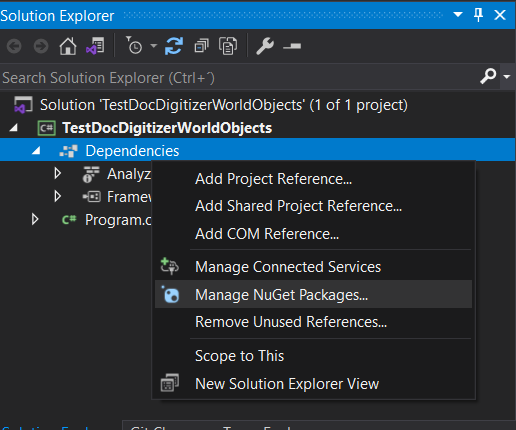
Go to your project and on "Dependencies," select "Manage NuGet Packages."

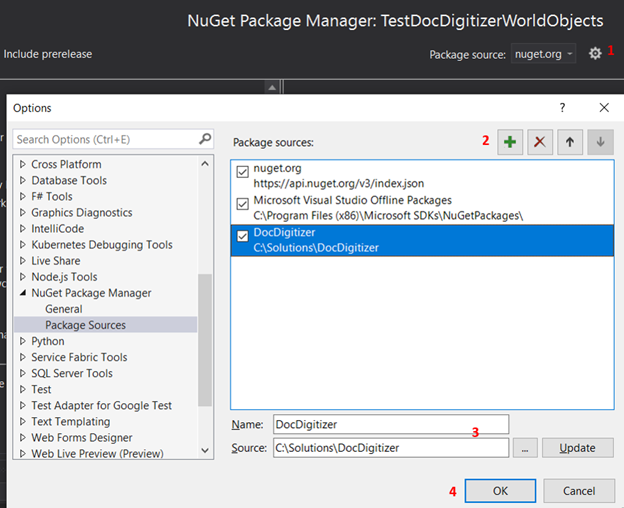
Because your NuGets are local folders, one way to access them is to create a new "Package Source."
Point the "Package Source" that you are creating to the folder where you previously downloaded your NuGets.

From "Package Source" select the one that you created ("DocDigitizer") and then go to "Browser" and select and install the two NuGets.

Create Test Program
Add the following code to your class:
static void ShowCatalog()
{
  Gender[] genders = Catalog<Gender>.GetAll();
  Console.WriteLine($"Currency from Local catalog: ");
  for (int i = 0; i < genders.Length; i++)
    Console.WriteLine($"{genders[i].Code} | {genders[i].Description}");

}

static void Main(string[] args)
{
  ShowCatalog();
}
This function "ShowCatalog" will write the list of all genders that you have on the catalog to the console.
You can download the solution at the link below:
Updated 10 months ago
